Excited and a wee bit apprehensive. A new school year. A new bunch of kids. An adventure. Take the short-cut between the demountables. What state will my room be in? Things are always moved for holiday cleaning! I’ve set aside four days to organise my room and prepare materials for the arrival of the children. Time to think, plan, experiment and create.
Four days to go: physical environment
The physical environment of a classroom reveals what a teacher believes about how children learn.
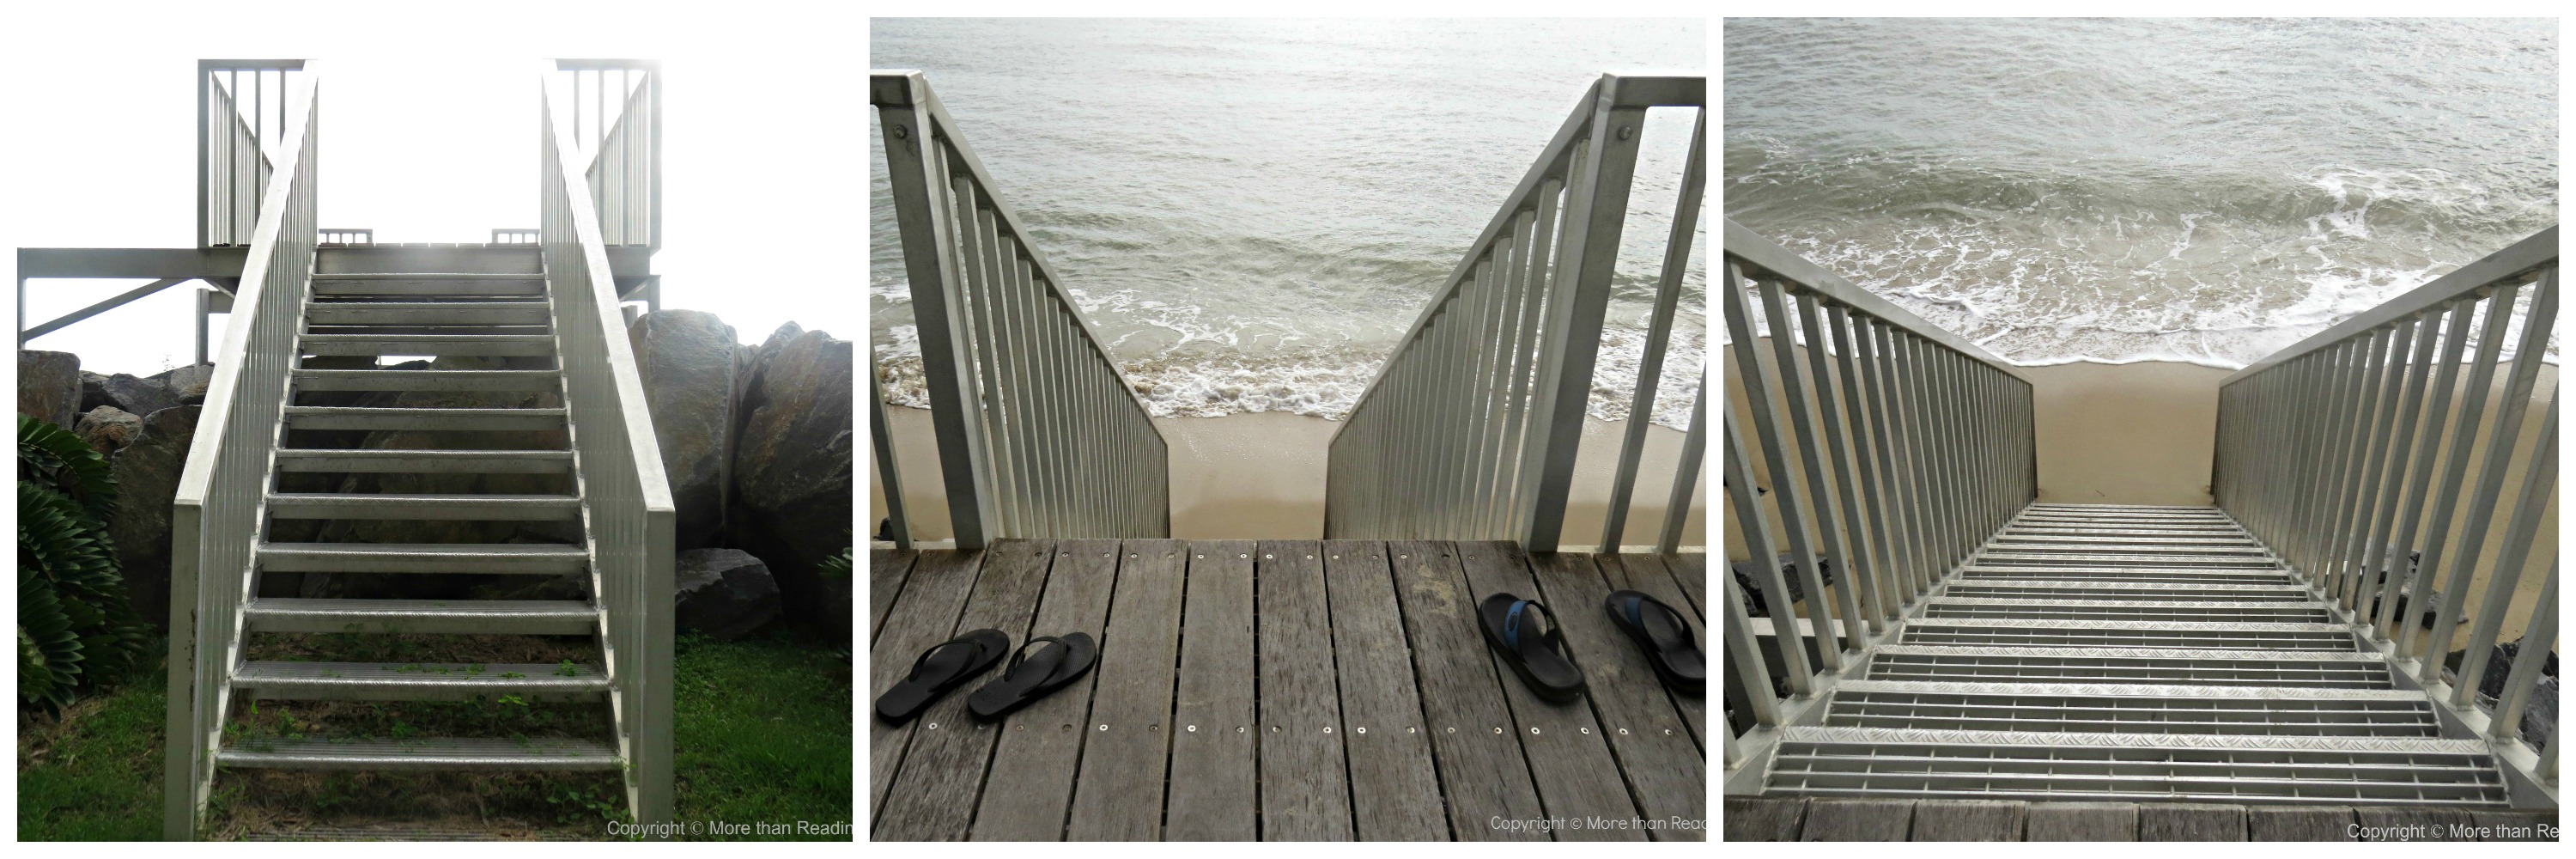
Walk up two flights of stairs to my room.

Put down my bag, insert the key and open the door. What will I see?

It’s quiet and dark.
Turn on the lights. Look around the room. Can’t miss the big pile of furniture – small tables, chairs, shelves – off to one side. Folding doors that separate the two classrooms are open. The fishnet ‘word wall’ that stretches across the doors is intact. Wonderful!
Most of the room is clear – a clean slate on which to design our learning environment. Perfect! Can’t wait to start moving things.
But first…
Where to start?
1. List the class ‘areas’ we need:
mat area for the whole class
reading, library, bookshelves
calendar wall
word wall(s)
computers and printer
maths
science/discovery
art /wet area
wooden blocks
construction materials
home corner/drama
morning message board
display areas
children’s storage (backpack/hats/lunches)
2. List the stationary items – things that can’t be moved:
whiteboard (a major part of class mat area)
IWB /data projector and screen
shelves/hooks (for children’s backpacks/hats)
refrigerator (for children’s lunches)
electrical outlets
computer connectors (computer area)
sink/counter/wet area (art area)
display boards on walls
built in cupboards
folding doors (word wall)
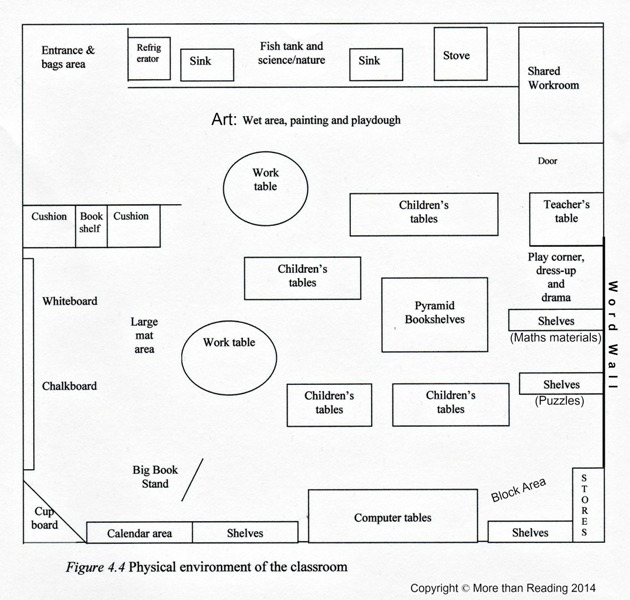
When I start the year in a new classroom I make a rough sketch and label possible class areas. But it’s my third year in this room and the sketch is in my head! One year I did a ‘proper’ plan of the classroom for my Doctoral Thesis in 2004 – not to scale!

Plan of a classroom physical environment.
Different room. Different stationary items. Different layout.
Stationary items determine some class areas
1. Mat area and whiteboard
The mat area is what makes my classroom ‘tick’. The placement of the mat area is determined by the whiteboard (for shared writing, explicit teaching and teachable moments), the screen (for a ceiling-mounted data projector) and a large display board that becomes the calendar wall. Presto! Class mat area.
The mat area is essential for whole class sessions – BIG enough for children to gather together comfortably. BIG enough for children to sit, stand and stretch. BIG enough for class story time, small group ‘co-operative show and tell’ and class circle for reporting/sharing times. For ease of class sharing, the following items will be adjacent to the mat area:
- calendar wall (for morning maths sessions)
- big book stand (for shared reading)
- pocket chart (for interactive reading)
- audio and CD player (for music and interactive story books)
- laptop (to use through the data projector onto the screen)

The mat area is the ‘hub’ of class gatherings
for shared literacy and learning practices.
2. Children’s backpacks/hats/lunches
That’s easy. Two long shelves for backpacks and hats are near the classroom entrance. The refrigerator stands against a nearby, out-of-the-way wall.
3. Computers
That’s easy. One printer and a bank of four computers are near electrical outlets and internet connectors – although wireless technology makes a difference now! Some older classrooms don’t have enough power outlets – for a laptop, data projector, fish tank, CD player, electric pencil sharpener, battery rechargers… power boards may solve outlet problems but be aware of safety issues: no loose cords across the floor for children to trip over.
4. Art
Another easy one. My art area is a wet area with vinyl floor, sink and counter. I add a collage trolley, a painting easel and tables for playdough/clay and collage.
5. Display areas
Two wires are strung across the room about a metre below the ceiling. Wonderful! Peg up and display children’s work – paintings, drawings and writing. Display boards are on several walls for longer term displays.
6. Word wall
The fishnet word wall stretches in front of the folding doors – these will be closed before the classes arrive.

Things are going well. Six ‘areas’ are placed around the stationary items – things that cannot be changed. Now for the other class areas on my list…
PLACING OTHER CLASS AREAS:
Once again, dig into the pile of furniture to construct the remaining class areas. Be creative!

Lifting, dragging, pushing – bit by bit the pile shrinks.
One at a time, pull out:
*a metal, triangular bookshelf (library/reading area)
*large floor cushions (library/reading area)
*pink, plastic, play stove (home/drama area)
*big book stand/small white board (shared reading, near mat area)
*pocket chart (whiteboard ledge, near mat area)
*morning message board (reading, door entrance)
*block shelves (block area)
*maths materials and shelf
*construction materials: buckets and boxes of mobilo, lego, duplo, etc.
*children’s tables and chairs

The pink, plastic, play stove goes in the home/drama area
Reflection: bigger area or smaller area?
‘Can the block area be improved?’
Last year it never seemed big enough. Can’t find anywhere else to put the out-of-the-way defined space (roads and buildings are often left up over days and nights so the area cannot be in a class walkway). Make the block area bigger?
Make the maths-shelves area smaller?
Yes. That’s OK. Children don’t ‘work’ in the maths area – they take materials from the shelves and work at tables or on the floor.

Decide on the block area.
Do not want to move the ‘blocks’ shelf too many times!
Establishing remaining class areas
Block area done. Maths shelves done. Home corner done. Bookshelves and reading area done.
Mobilo, lego, constructions and puzzles – not yet done.

Brightly coloured covers on big cushions brighten the reading areas –
where children sit, read, rest and talk.
Place tables and chairs where children will ‘work’, putting tables together to make hexagonal tables or clusters of rectangular tables.

Children face each other to interact, discuss, co-operate and
share – essentials in my beliefs about how children learn!
Finding a home for the last table
Finally… the pile of furniture has vanished! The last table finds a home in the science /discovery area. Improve the tatty table with a cream, cotton cloth. That’s better!

Stand back and survey
I’m happy. Six areas are established around stationary items. Five other areas fall into place:
bookshelves/cushions/reading area
hands on materials/maths area
science/discovery area
blocks area
home corner/drama area.
Construction materials, like lego, duplo and mobilo are still without a home. Maybe tomorrow?

Survey the scene.
The physical environment of the classroom is taking shape. Tomorrow, sort materials, put in their places and create the calendar wall for ‘real world’ maths.
Finally…
Stop by the office. Pick up my class list. Check for familiar names – wonder if there are younger brothers or sisters of children in previous classes? Tomorrow, use the class list to make name charts, name cards and class book pages for the children’s first day. But now, put the list away. It’s time to go home.
Coming Next:
Starting School Series, Part 2: Sorting materials and making a calendar wall.